Winter chills threaten your precious plants. Keeping a greenhouse warm seems costly and complex. You need reliable, efficient ways to maintain the right temperature without breaking the bank.
The best ways to keep a greenhouse warm involve combining active heating (like electric, gas, or propane heaters) with passive methods like maximizing insulation (sealing gaps, using bubble wrap), harnessing solar heat with thermal mass, and using thermostats for precise temperature control.
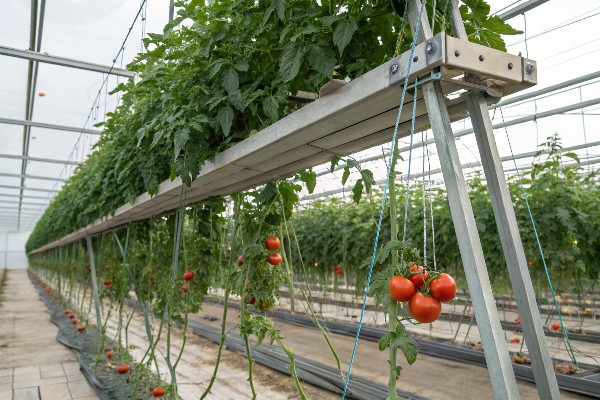
Keeping plants thriving through the cold months is a major goal for many growers I talk to. Whether you’re a hobbyist or running a large commercial operation, winter presents unique challenges. The dropping temperatures outside mean the cozy environment inside your greenhouse is constantly under threat. It’s not just about preventing frost; it’s about maintaining the optimal conditions for growth, flowering, or overwintering specific plants. Over the years, we at CFGET have worked with countless clients facing this exact issue, from humid Southeast Asia needing supplemental heat occasionally, to the harsh winters of Central Asia requiring robust systems. Finding the right balance between effective heating and manageable costs is key. Let’s explore the different strategies you can use.
You might be interested in:—— 12 Common Greenhouse Types
Don’t Miss:——Is Commercial Greenhouse Farming Really A Profitable Business Opportunity?
Choosing the Right Greenhouse Heating System (Electric, Gas, Propane)?
Worried about picking the wrong heater? An inefficient system wastes money and might not even keep your plants warm enough. Choosing requires careful thought about your specific needs.
Select a heating system based on greenhouse size, insulation level, climate, budget, and available utilities. Electric heaters are clean and easy but can be costly to run. Gas and propane offer powerful heat but require proper ventilation.
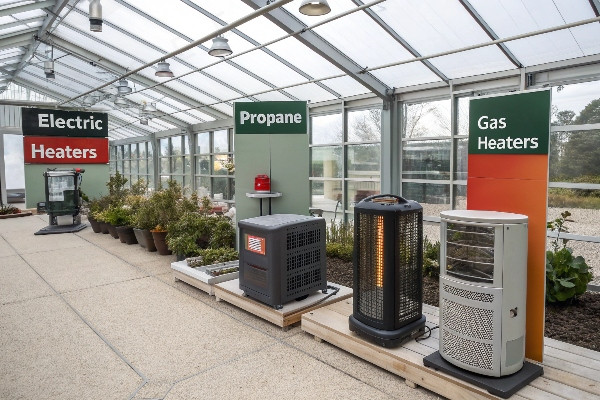
Choosing the right heating system is fundamental. It’s often the first thing people ask about when planning for winter. There isn’t a single "best" answer; it really depends on your situation. Let’s break down the common options: electric, natural gas, and propane.
-
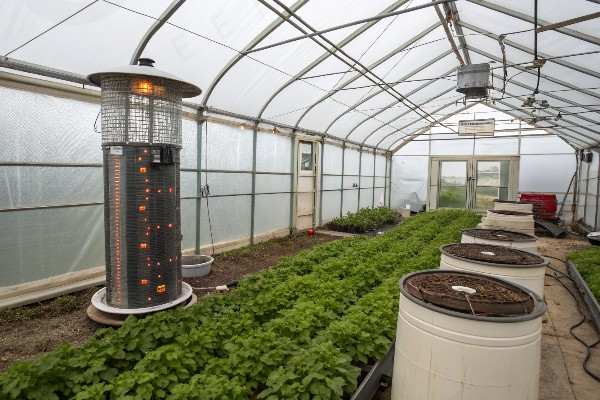
Electric Heaters: These are often the simplest to install and use. Many are portable fan heaters, which help distribute warm air. They don’t produce combustion fumes, so ventilation isn’t a concern for air quality (though air circulation is always good for plants). However, electricity costs can be high, especially if you need significant heating for a large or poorly insulated space. For smaller hobby greenhouses or as a backup, they can be great. We’ve seen clients in areas with moderate winters use them effectively, often paired with good insulation. They are also good where precise temperature control is needed, like in research institutions. Think about the wiring – you need a suitable power source and potentially weatherproof outlets.
-
Natural Gas Heaters: If you have access to a natural gas line, this can be a very cost-effective option for heating larger spaces. Natural gas is typically cheaper than electricity or propane per unit of heat (BTU). These heaters are powerful and can handle demanding cold climates. The downside? Installation is more complex and expensive, requiring professional connection to the gas line and mandatory ventilation. Combustion produces water vapor (which can be good or bad depending on your humidity needs) and carbon dioxide, but also potentially harmful gases like carbon monoxide if not vented correctly. Proper venting is non-negotiable for safety. Large agricultural producers often favor these for their lower running costs.
-
Propane Heaters: Propane offers similar heating power to natural gas but uses portable tanks, making it suitable for locations without a gas line. This flexibility is a plus. Like natural gas heaters, they require careful venting due to combustion byproducts. The cost of propane can fluctuate and is often higher than natural gas, though sometimes competitive with electricity depending on local rates. Refilling or swapping tanks is an ongoing task. We see propane used frequently by growers in rural areas or those needing potent heating without access to natural gas infrastructure, common for some clients in Central Asia needing robust solutions.
Here’s a simple table comparing them:
| Feature | Electric Heater | Natural Gas Heater | Propane Heater |
|---|---|---|---|
| Installation | Easy, plug-in | Complex, needs gas line, venting | Moderate, needs tank setup, venting |
| Running Cost | Can be High | Generally Lowest | Moderate to High |
| Heat Output | Lower to Moderate | High | High |
| Ventilation | Not needed (for combustion) | Essential | Essential |
| Fuel Access | Needs electrical outlet | Needs natural gas line | Needs propane tank delivery/refill |
| Cleanliness | Cleanest (no combustion) | Combustion byproducts | Combustion byproducts |
| Best For | Small/hobby greenhouses, backup heat | Large greenhouses, low running cost | Areas without gas lines, high heat |
When I consult with growers, we always start with their greenhouse size, the typical winter lows in their region, how well the structure is insulated, and their budget for both the unit and ongoing fuel costs. For our European clients focusing on sustainability, the source of electricity (renewable?) or the efficiency rating of gas units often becomes part of the discussion. In Southeast Asia, where winters are milder but humidity is high, an electric heater might suffice and avoids adding more moisture from gas combustion.
Maximizing Insulation: Sealing Gaps and Using Bubble Wrap?
Is your heating bill sky-high despite running the heater constantly? Heat might be escaping through countless small gaps and radiating through the glazing. Poor insulation undermines any heating effort.
Seal air leaks around doors, vents, and panels using weather stripping or caulk. Adding a layer of horticultural bubble wrap to the interior surfaces significantly reduces heat loss through the glazing.
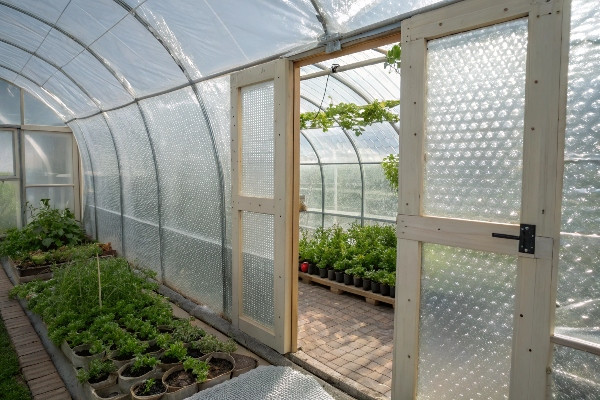
Heating a greenhouse is one thing; keeping that heat inside is another, equally important battle. Insulation is your best friend here. Think of it like putting on a winter coat – the thicker and more complete the coverage, the warmer you stay. In greenhouse terms, this means tackling both air leaks and heat loss through the structure itself.
Air leaks are sneaky energy thieves. Even small gaps around doors, windows, vents, or where panels meet can add up to significant heat loss. I always recommend doing a thorough check:
- Visual Inspection: Look for obvious gaps or cracks.
- Feel for Drafts: On a windy day, run your hand along seams and openings.
- Smoke Test (Carefully!): On a calm day, use an incense stick near potential leak points (from the inside) and watch if the smoke is drawn out.
Once you find the leaks, seal them. Weather stripping is great for moving parts like doors and vents. Use foam or rubber strips that compress to create a seal. For stationary gaps, silicone caulk is usually the best bet. Pay special attention to the base of the greenhouse where it meets the foundation.
The biggest area of heat loss, however, is usually through the glazing material itself – whether it’s glass, polycarbonate, or film. This is where insulation materials come in. Bubble wrap, specifically horticultural grade bubble wrap with larger bubbles and UV stabilization, is a popular and effective choice. It traps air between its layers, creating an insulating barrier, much like double glazing. Apply it to the inside surfaces of the greenhouse walls and roof. You can use special clips, tape, or create simple frames to hold it in place. Remember to leave vents and doors usable! The difference can be substantial – potentially cutting heat loss through glazing by up to 50%.
Based on my experience at CFGET, especially in colder regions like parts of Central Asia or Northern Europe, robust insulation is non-negotiable for commercial operations. We often design systems incorporating top insulation (like thermal screens or blankets pulled across under the roof at night) and side-wall insulation (curtains that deploy along the inner walls). These systems dramatically reduce the volume of air that needs to be heated during the coldest periods, primarily overnight. As my insight mentioned, these insulation curtains act like a protective blanket, preventing rapid heat loss and slashing energy consumption for heating. For film greenhouses, we sometimes even design structures with external berms or utilize a double-layer film system (inflated with air) to create an even more effective insulation barrier, essentially giving the walls double protection against the cold. This approach offers great thermal performance, which is crucial for maintaining stable temperatures efficiently.
Utilizing Passive Solar Heat and Thermal Mass Effectively?
Can you heat your greenhouse for free? Relying solely on heaters is expensive. Capturing the sun’s natural energy can significantly reduce your heating needs, but how do you store it?
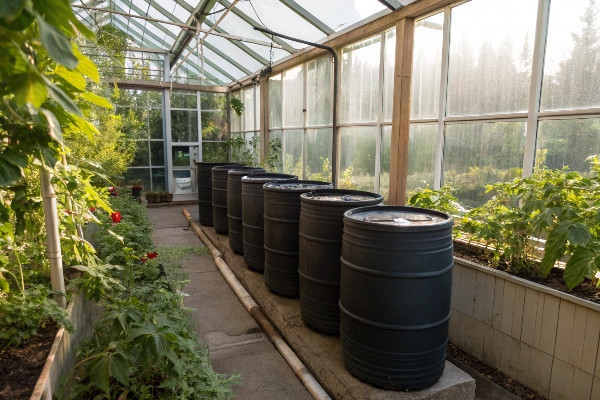
Maximize sunlight entering the greenhouse, especially from the south side. Use ‘thermal mass1‘—materials like large water barrels (painted black) or masonry—inside the greenhouse to absorb solar heat during the day and release it slowly at night.
The sun is a powerful, free heat source, even in winter. Passive solar heating is all about maximizing the capture of this energy during the day and storing it for release during the colder night. It won’t replace an active heating system in most climates during deep winter, but it can significantly reduce how much that system needs to run.
First, ensure maximum sunlight penetration. Clean your greenhouse glazing regularly, as dirt and grime can block precious winter sun. Prune any nearby trees or shrubs that might cast shadows on the greenhouse, especially from the south (in the Northern Hemisphere). The orientation of the greenhouse itself matters – ideally, the longest side should face south to capture the low winter sun angle.
The core concept of passive solar heating2 is thermal mass. This refers to materials that can absorb and store large amounts of heat energy. Dense, dark materials work best. Inside the greenhouse, you introduce these materials strategically where they will receive direct sunlight. Common options include:
- Water Barrels: Large barrels (like 55-gallon drums) filled with water and painted black are excellent. Black absorbs the most solar energy, and water has a high specific heat capacity, meaning it can store a lot of heat. Place them along the north wall (inside) where they get maximum sun exposure but don’t block light from plants.
- Masonry: Brick, concrete blocks, stone, or even a thick masonry floor can act as thermal mass. A brick or stone path down the center or a solid north wall built from these materials can absorb heat all day.
- Soil: The soil in raised beds or large containers also contributes to thermal mass, though less effectively than water or dense masonry.
During the day, the sun heats these materials. As the temperature drops in the evening and overnight, the thermal mass slowly releases the stored heat back into the greenhouse environment, buffering the temperature drop and reducing the load on your main heating system.
I remember visiting a grower in a region with cold but sunny winters. They had lined the entire north wall of their poly tunnel with black water barrels. They calculated it reduced their propane usage by nearly 30% just by leveraging passive solar gain and thermal mass. It’s a simple, low-tech approach that leverages natural processes. For CFGET projects, especially when designing from scratch, we consider incorporating thermal mass1 elements if the climate and client goals align with this strategy. It ties into the sustainability focus many European clients have, reducing reliance on fossil fuels or electricity. Even in Southeast Asia, while intense heating isn’t the primary concern, stabilizing night temperatures using thermal mass can benefit certain crops.
Maintaining Optimal Temperatures with Thermostats and Monitoring?
How do you ensure your greenhouse stays consistently warm, not too hot or too cold? Guessing temperatures is risky for plants and wastes energy. You need precise control and awareness.
Use a reliable thermostat3 connected to your heating system to automatically maintain the desired temperature range. Monitor conditions regularly using minimum-maximum thermometers placed at plant level to ensure accuracy and spot any issues.
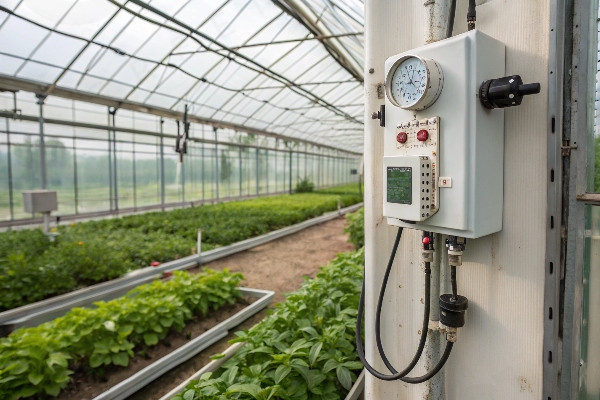
Installing a heating system and insulation is only part of the equation. You need control and monitoring to ensure the environment stays within the optimal range for your specific plants, without wasting energy by overheating or risking damage from unexpected cold snaps. This is where thermostats and thermometers are essential.
A thermostat is the brain of your heating system. It senses the air temperature and turns the heater on or off to maintain the set point you’ve chosen.
- Simple Mechanical Thermostats: These are basic on/off switches, often with a dial. They are inexpensive but can have a wide temperature swing (the difference between when the heater turns on and off).
- Digital Thermostats: Offer more precision and often have programmable settings. You can set different temperatures for day and night, which is useful as plants often tolerate slightly cooler nights, saving energy.
- Smart Thermostats: These connect to Wi-Fi, allowing remote monitoring and control via your phone. Some can learn your greenhouse’s heating/cooling cycle and optimize for efficiency. They might also provide alerts if temperatures go outside a safe range. This is increasingly popular with our tech-savvy clients and research institutions needing tight control and data logging.
Placement is crucial. Don’t put the thermostat right next to the heater, in direct sunlight, or near a cold draft by the door. It should be placed at plant level, ideally in a central location, and shielded from direct sun or heat sources to get an accurate reading of the conditions your plants are actually experiencing.
Beyond the thermostat controlling the heater, you need independent monitoring. A minimum-maximum thermometer is invaluable. This simple device records the highest and lowest temperatures reached since it was last reset. Place one or two at plant level in different parts of the greenhouse. Checking this daily gives you a true picture of the temperature fluctuations, helping you verify if your thermostat is working correctly and if the range is suitable for your crops. It can alert you to problems, like the heater failing overnight (low minimum) or the greenhouse overheating on a sunny winter day (high maximum).
At CFGET, we emphasize the importance of reliable environmental controls. For commercial growers, especially those in Europe and America focused on precision agriculture, integrated systems that monitor temperature, humidity, CO2, and light, and control heating, ventilation, and lighting automatically, are standard. Even for simpler setups, investing in a good digital thermostat and a min-max thermometer provides crucial control and peace of mind. It prevents energy waste from overheating and protects valuable plants from damaging cold, ensuring the investments in heating and insulation pay off. We ensure our clients understand how to calibrate and position these devices for the best results, regardless of their location or the scale of their operation.
Conclusion
Effectively warming a greenhouse involves choosing the right heater, maximizing insulation, using passive solar heat, and precise monitoring. Combining these methods ensures plant survival and optimizes energy use.
-
Understanding thermal mass can help you optimize your greenhouse’s heat retention and energy efficiency. ↩ ↩
-
Exploring passive solar heating techniques can significantly reduce your greenhouse heating costs and improve sustainability. ↩
-
A reliable thermostat is crucial for maintaining optimal temperatures, ensuring plant health and energy efficiency in your greenhouse. ↩